
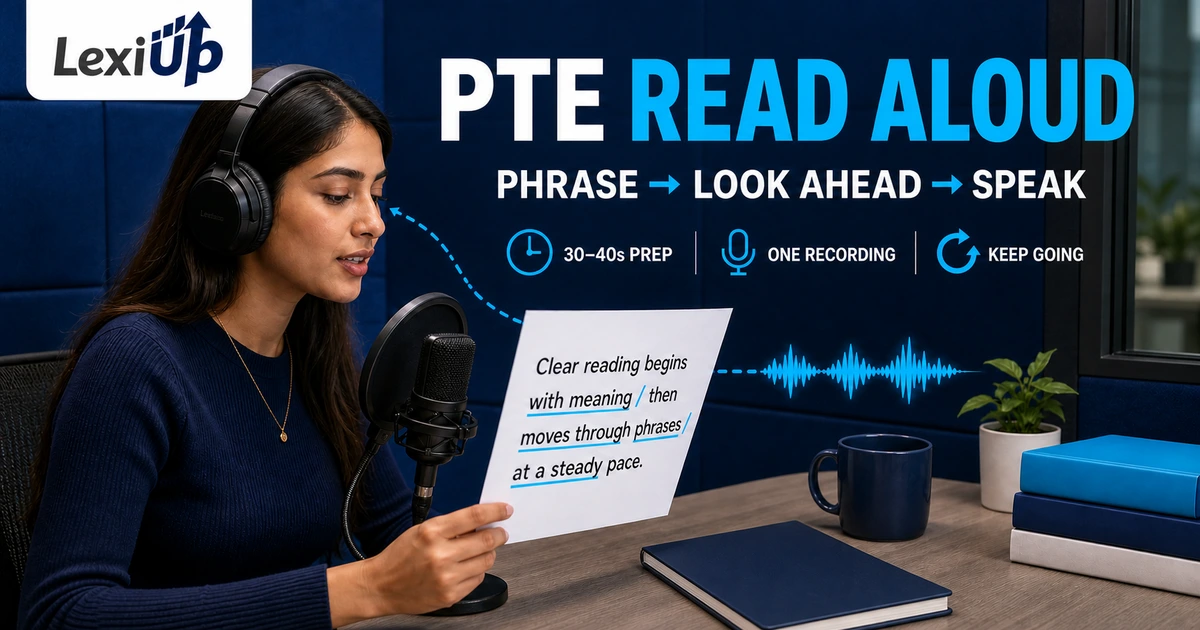
For: PTE Academic and PTE Core learners who want a calm text-to-voice method for accurate words, clear pronunciation, and steady oral fluency
What PTE Read Aloud practice should train
PTE Read Aloud practice should connect three actions: understand the sentence, prepare useful phrase groups, and deliver every word in a clear, steady voice. The task is not a race and it is not a performance of an invented speech. You read the text on screen once, so your preparation needs to support both accuracy and flow.
Pearson currently describes the task the same way in PTE Academic and PTE Core: the text can contain up to 60 words, you normally have 30–40 seconds to look at it and prepare, and you record one response. Pearson advises speaking clearly without rushing and finishing before the recording progress bar ends.
The exact time shown can vary by item, so follow the live timer on screen.
The score uses three traits: Content, Pronunciation, and Oral Fluency. Content is affected by replaced, omitted, or inserted words. Pronunciation concerns how understandable the speech sounds are, while Oral Fluency considers rhythm, phrasing, stress, pace, hesitation, repetition, and false starts. A useful routine must protect all three rather than chasing only speed.
| Feature | Current task detail | Practice decision |
|---|---|---|
| Text length | Up to 60 words | Prepare the whole passage, not only the opening |
| Preparation | Usually 30–40 seconds | Mark phrases and risky words quickly |
| Recording | One response | Continue after a small mistake instead of restarting |
| Content | Words from the text | Avoid replacements, omissions, and insertions |
| Pronunciation | Understandable speech sounds and stress | Prioritise clarity over an imitated accent |
| Oral Fluency | Rhythm, phrasing, stress, and rate | Use meaningful groups at a natural pace |
Step 1: read once for meaning
Use the first few seconds to understand what the passage says. Identify the subject, the main action, and the relationship between ideas. Notice whether the sentence explains a reason, contrasts two points, lists examples, or gives a result. Meaning gives you a sensible place to pause and a reason to stress particular words.
Do not begin by silently pronouncing every word at speaking speed. That often uses most of the preparation time without creating a plan. Scan the complete text first, then return to difficult areas. A short mental label such as “city trees reduce heat” or “research compares two methods” is enough to keep the message coherent.
Check punctuation because it shows structure, but do not treat every comma as an automatic long pause. A comma may separate a short introductory phrase, items in a list, or a dependent clause. Read the relationship, then choose a pause that keeps the sentence easy to understand.
Step 2: mark meaningful phrase groups
Divide the passage into small groups that carry one piece of meaning. A phrase group might contain a subject and verb, a prepositional phrase, or one part of a list. Mark a light slash between groups during practice.
The slash is not a demand for silence; it is a reminder that the words inside the group should stay connected.
Keep grammar units together. Avoid separating an article from its noun, an auxiliary from its main verb, or a preposition from the phrase that follows. “The results / of the survey” can be natural, while “the / results of” breaks the listener’s expectation. If one group feels too long, divide it at a clear clause or meaning boundary.
Phrase marking should become quick. Start with untimed practice where you explain every boundary. Then give yourself 30–40 seconds and mark only the most useful breaks. Your final goal is not a page covered with symbols. It is a simple route through the text that helps you speak without word-by-word chopping.
| Original sentence | Possible phrase plan | Reason |
|---|---|---|
| Local libraries now lend tools as well as books, helping residents complete small repairs without buying equipment. | Local libraries now lend tools as well as books / helping residents complete small repairs / without buying equipment. | Each group carries one complete part of the message. |
Step 3: prepare stress and difficult words
Choose a few content words that carry the message: important nouns, main verbs, descriptive words, and contrast terms. Give these words natural prominence rather than making every word equally strong. Grammar words still need to be audible, but they usually sit inside the rhythm instead of receiving the main stress.
Circle or mentally note words that could interrupt you. Break a long word into familiar syllable groups, check a common prefix or ending, and rehearse it once inside the phrase. Do not repeat it many times in isolation. The test response needs the word connected to its neighbours, so practise the transition into and out of it.
Aim for understandable pronunciation, not a copied accent. Pearson recognises regional and national varieties of English when regular speakers can understand them. Clear vowels and consonants, suitable word stress, and a steady phrase are more useful targets than trying to sound like a particular speaker.
- Underline the words that carry the main meaning.
- Mark one contrast word when the sentence changes direction.
- Rehearse only the words likely to stop your flow.
- Put every difficult word back into its phrase.
Step 4: rehearse the opening and ending
Use part of the preparation time to rehearse the first phrase silently or very softly according to the test-centre instructions. A prepared opening helps you start after the short tone without a long hesitation. Know the first three to six words as one unit rather than launching after seeing only the first word.
Also check the final phrase. Many learners use all their attention at the beginning, then rush or drop words when the progress bar approaches the end. Read the last group once during preparation and notice the final punctuation. Plan to finish the complete text with a clear ending, not an added summary or “thank you.”
Keep your volume similar to a normal phone conversation and position the microphone as directed during the equipment check. A louder voice is not automatically clearer. Stable distance and a comfortable volume make it easier to maintain the same sound from the first phrase to the last.
Step 5: keep your eyes ahead of your voice
While speaking, let your eyes move a few words ahead of the words you are saying. This small eye-to-voice lead gives your brain time to recognise the next phrase and reduces surprise at a long word or clause. Do not look so far ahead that you lose your current place. One short phrase is enough.
Practise this skill with a finger or cursor moving under the text. Keep the marker under the phrase your eyes are preparing, not the exact word leaving your mouth. Over several sessions, remove the marker and keep the same gentle lead. If you frequently skip words, shorten the distance until accuracy returns.
Use punctuation and your phrase marks as visual checkpoints. At each boundary, confirm where the next group begins, take only the breath you need, and continue. The goal is continuous reading with controlled transitions, not a perfectly even stream with no natural phrasing.
Step 6: speak clearly at a sustainable pace
Start after the tone when the microphone is open, then use a pace you can keep to the final word. Pearson explicitly says there is no need to rush. Fast speech can create omitted sounds, substitutions, uneven stress, and a breath problem near the end. Very slow word-by-word reading can break phrasing and sound hesitant.
Listen for connected meaning rather than a fixed words-per-minute target. A longer technical word may need more time, while a familiar short phrase can move naturally. Keep pauses brief and purposeful. If you need a breath, take it at a phrase boundary instead of stopping between words that belong together.
Do not use artificial rises and falls on every phrase. Let important information receive stress and let complete ideas settle naturally. Record yourself from a realistic distance and ask one practical question: can a listener follow the message without reading the text? That check is more useful than judging whether the voice sounds impressive.
Step 7: recover without restarting
If you mispronounce or replace a word, continue from the next clear point. Restarting the whole sentence adds repetition and can damage the flow while using more recording time. A calm recovery limits one mistake instead of turning it into several. Keep your eyes on the next phrase, not on the word that has already passed.
Avoid inserting an apology, explanation, or filler. The task asks you to read the text, so added language does not help content. If a word catches you, say your best controlled version once and continue. During review, return to that transition and practise it in a new sentence rather than trying to repair it inside the recorded response.
Finish before the progress bar reaches the end. Do not add closing words after the final punctuation. When the complete passage is delivered, stop speaking and allow the system to finish the item. A clean ending protects the final words and keeps the response faithful to the text.
Use a focused 20-minute practice session
Choose three original or authorised passages between about 40 and 60 words. The first passage is for slow phrase analysis, the second for timed preparation, and the third for transfer without written marks. This sequence lets you understand the method before testing whether it survives normal task pressure.
Record each passage once. Do not keep recording until one version sounds perfect because that trains repetition rather than first-attempt control. Review the audio against the written text, mark every replacement, omission, or insertion, and then listen once for phrase rhythm and understandable pronunciation.
Choose one correction for the next passage. If the first response lost words, shorten the eye lead. If it sounded chopped, join grammar units. If the end was rushed, prepare the final phrase and begin slightly more calmly. One specific adjustment makes progress easier to observe than a long list of general speaking goals.
| Time | Action | Evidence to keep |
|---|---|---|
| 0–5 min | Analyse and mark one passage | Phrase boundaries and risky words |
| 5–9 min | Record it once and compare with the text | Replacements, omissions, and insertions |
| 9–14 min | Prepare and record a new passage with the timer | Opening, pace, and final phrase |
| 14–18 min | Read a third passage without written marks | Whether the method transfers |
| 18–20 min | Write one correction for next time | A single observable action |
Diagnose the problem before repeating the passage
A Read Aloud response can sound weak for different reasons. Missing words may come from an eye lead that is too large, while repeated words can come from returning your gaze to a phrase already spoken. Long silent gaps may reflect unclear phrase planning, unfamiliar vocabulary, or breathing at the wrong place.
Name the cause before choosing a drill.
Separate content review from sound review. First compare the recording with the text and mark word-level changes. Then listen without looking at the text and judge whether the message is understandable and the phrase rhythm is steady. Mixing every issue into one judgement makes it difficult to know what to change.
Keep an error log across several passages. Useful labels include “lost final word,” “paused inside noun phrase,” “rushed after long word,” and “restarted after error.” Avoid predicting an official score from a home recording. The log is a practice tool, not a Pearson score report.
| Problem | Likely cause to check | Next drill |
|---|---|---|
| Skipped word | Eyes moved too far ahead | Use a shorter eye lead with a finger guide |
| Choppy rhythm | Groups are too small | Join articles, auxiliaries, and prepositional phrases |
| Rushed ending | No final-phrase plan | Rehearse the last group before recording |
| Long hesitation | Risky word found too late | Scan and rehearse difficult transitions during preparation |
| Repeated opening | Started without a prepared first phrase | Rehearse the opening group once |
Build fresh practice without copying test material
Use public information from museums, universities, government services, or your own original writing to build practice passages. Keep each text coherent and suitable for reading aloud. Do not collect recalled live-test questions or reproduce protected preparation material. The skill comes from processing new language, not memorising one passage.
Create variety deliberately. Include one passage with a list, one with a contrast, one with a long subject, and one with two linked clauses. Rotate familiar and unfamiliar topics so you learn to find structure quickly. Keep the language natural; a passage filled with rare words tests a different problem from normal sentence planning.
Check the word count and read the passage yourself before using it. Remove awkward errors that would make any reasonable delivery confusing. Record the source or note that the text is original. A clean practice library makes review honest and lets you compare the same process across different structures.
Use a final Read Aloud checklist
Before the tone, confirm that you understand the message, know the first and last phrase, and have identified the few words most likely to interrupt you. During the response, keep your eyes one short phrase ahead, speak at a sustainable pace, and preserve the text exactly as well as you can.
After a small mistake, continue. Do not restart, apologise, or add a closing statement. Finish the passage before the progress bar ends and stop after the final word. These actions are simple, but they protect Content, Pronunciation, and Oral Fluency at the same time.
Use this checklist to make PTE Read Aloud practice consistent, then review one recording with one clear correction. The purpose is not to manufacture perfect audio. It is to build a repeatable text-to-voice process that remains calm when the passage is new.
- I understand the main message and structure.
- I grouped words by meaning rather than one word at a time.
- I prepared the opening, ending, and difficult transitions.
- I will speak clearly without rushing or copying an accent.
- I will continue after a small error and finish before time ends.
Frequently asked questions
How long is PTE Read Aloud?
Pearson currently states that the prompt can contain up to 60 words. The preparation time is normally 30–40 seconds, and the exact answer time shown can vary by item.
What scores are affected by Read Aloud?
Pearson scores Read Aloud for Content, Pronunciation, and Oral Fluency. Its current task notes say it affects reading, speaking, pronunciation, and oral fluency.
Should I read as fast as possible?
No. Pearson advises speaking clearly and says there is no need to rush. Use a natural pace that lets you include the complete text before the progress bar ends.
Should I restart after a mistake?
No. You can record only once, and restarting creates repetition and disrupts flow. Continue from the next clear point and review the mistake after practice.
Do I need to copy a particular English accent?
No. Pearson recognises regional and national varieties of English when they are understandable to regular speakers. Focus on clear sounds, suitable stress, and steady phrasing.
Does LexiUp provide an official Pearson score?
No. LexiUp PTE supports independent practice and review. It does not issue or guarantee an official Pearson score.
Sources and review note
This guide was reviewed against the sources below. LexiUp remains independent of the exam owners.